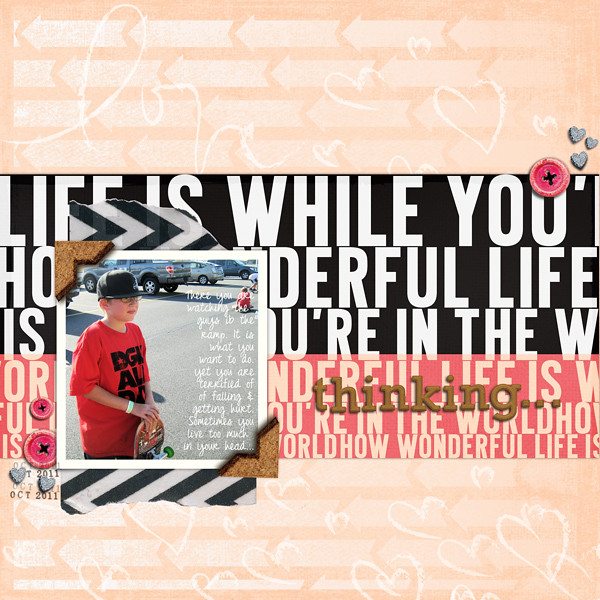
I fell in love with the graphic papers and the arrow cut out paper, which I decided to use as a stencil. We've been talking about stencils over at Get It Scrapped during Office Hours and our live crops lately (see the forums for live crop info). There's also a great article on the subject of using full page stencils on the GIS blog.
I'm going to preface this by telling you I started with a new 12" x 12" file at 300dpi. This tutorial works for Photoshop and Photoshop Elements similarly.
This is the arrow cut out paper:
I used the magic wand to select all those arrows (marching ants- not shown cause screen capture hates me).
I created a new raster layer to put my digital 'paint' on.
I selected an off-white color and created a gradient in the materials palette- right click on the foreground color to bring up menu and the click the 'other button' (most programs have a white gradient included as a preset). If you want to use a color other than white, select the 'fading foreground' option.
I flood filled the arrows with my new layer highlighted in the layers.
I deleted the arrow paper layer and used ctrl+d to deselect (get rid of marching ants).
Then the real magic happens. With my new, awesome stenciled arrow layer highlighted in the layers palette, I right clicked to bring up the layer properties menu.
Here's what that menu looks like in Paint Shop Pro (and it's similar in Photoshop):
Use the Underlying Layer sliders to bring the texture of your paper into your stencil. For light papers, start with the sliders on the right. For dark papers, use the sliders on the left.
In Photoshop Elements, use the blending modes and opacity slider to achieve a similar effect.
This will make your stencil looks more realistic. Yay!!
Tada!!

(I used the Storyteller February 2014 Chipboard Alpha for my title, which I'm kinda in love with)


No comments:
Post a Comment
♥ Thanks for taking the time to comment. It is appreciated ♥